
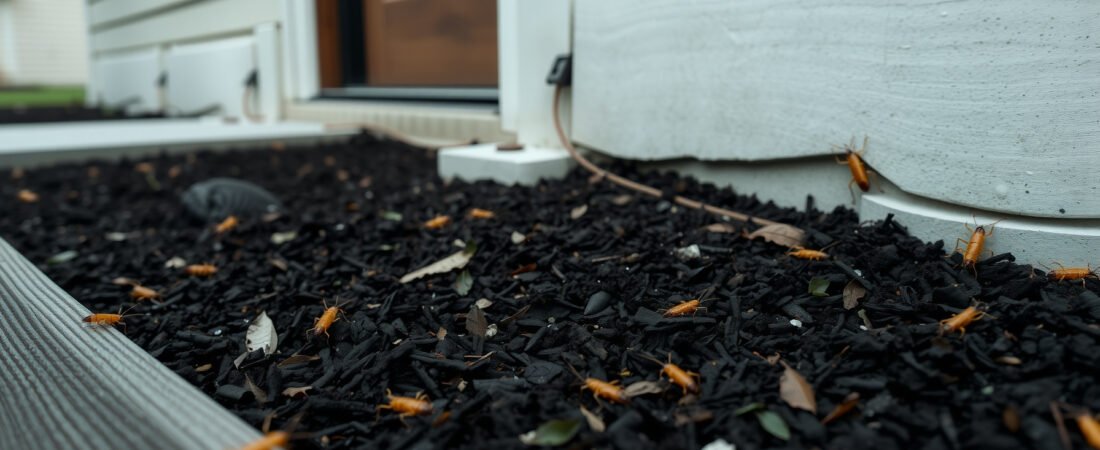
Earwigs don’t infest homes because your house is dirty or your garden is neglected — they move inside because you’ve made the perimeter around your foundation accidentally perfect for them. That’s the part most people miss entirely. You can spray the inside of your home six times and still wake up to earwigs on the bathroom floor every morning, because the real problem is the 18-inch zone right outside your door.
Here’s the bottom line: eliminating earwigs is a two-front problem. You have to disrupt the outdoor harborage conditions first, then seal the specific entry points they’re using — in that order. Do it backwards and you’re just pushing an endless supply of earwigs through the same cracks forever.
Why Are Earwigs Suddenly Appearing Inside Your Home?
Earwigs are not indoor insects by preference. They’re outdoor scavengers that eat decomposing plant matter, soft-bodied insects, and — here’s the counterintuitive part — they’re actually beneficial in a garden in small numbers. The reason they end up in your home isn’t that they want to be there; it’s that something in your perimeter environment is so ideal that they’ve built up a massive outdoor population, and a few inevitably wander in through gaps at ground level.
The trigger is almost always moisture paired with hiding cover. Earwigs are strongly thigmotactic — they instinctively squeeze into tight, dark, damp spaces. A pile of mulch against your foundation, a stack of firewood next to the siding, or even a garden hose left coiled on a concrete slab can harbor hundreds of earwigs within a few inches of where your walls meet the soil. On a warm night, it takes almost nothing for 15 to 20 of them to find a gap under a door sweep or along a utility conduit and end up inside.
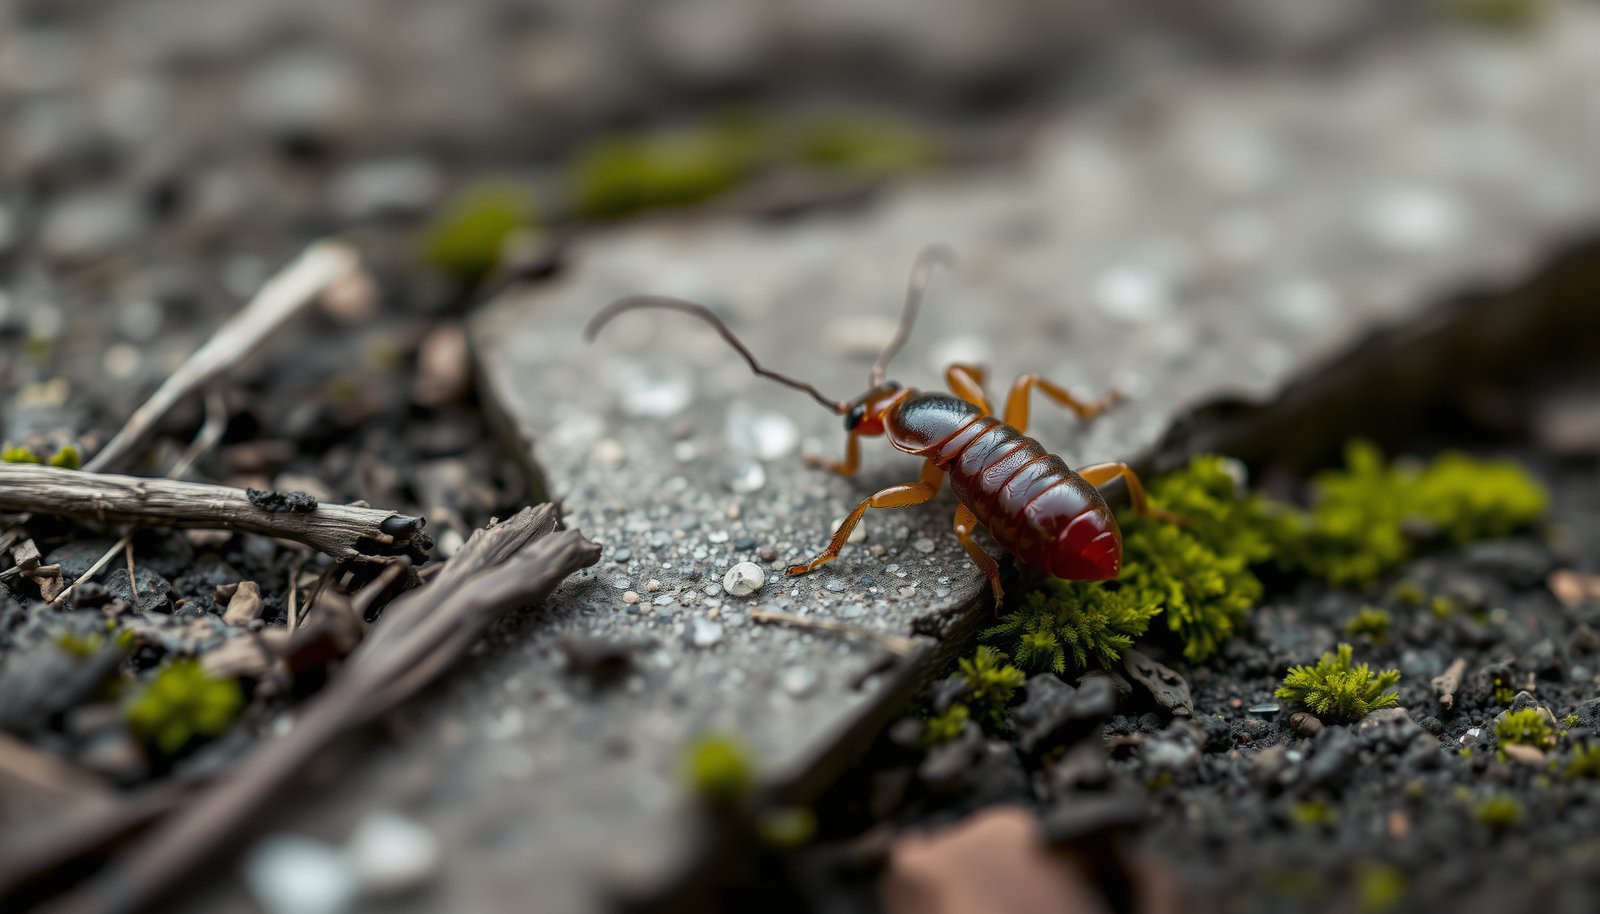
This close-up shows the characteristic pincer-tipped abdomen (forceps) that makes earwigs immediately identifiable — if you’re seeing this shape near your foundation or in a basement corner, you’re dealing with an earwig population that’s almost certainly living just outside the wall.
What Garden Conditions Are Breeding Earwigs Right Outside Your Walls?
Picture this: you’ve got a nicely landscaped front bed with 3 inches of decorative bark mulch running right up to your foundation, a drip irrigation line that keeps the soil consistently moist, and a low-growing ground cover that shades the soil all day. To you, that’s curb appeal. To a female earwig, that’s a five-star maternity ward. A single female earwig can lay 30 to 80 eggs per clutch — and unlike most insects, she actually guards those eggs until they hatch, which means nests survive at a higher rate than you’d expect.
The outdoor earwig population directly feeds the indoor earwig problem, which is why any strategy that only treats inside the house has a short shelf life. You need to make the perimeter around your foundation genuinely hostile. That means pulling mulch back at least 6 inches from the foundation, fixing any drainage that keeps soil wet for more than 24 hours after rain, and removing ground-level debris piles within 10 feet of entry doors. This isn’t about being a perfect gardener — it’s about disrupting the specific conditions earwigs need to build a population large enough to spill indoors.
“Homeowners focus almost entirely on chemical treatments and miss the structural habitat issue entirely. Earwig pressure inside a house is a lagging indicator — it tells you there’s already a large, well-established population within a few feet of the building. Address the harborage first. The insecticides are just maintenance after that.”
Dr. Ellen Marsh, Board-Certified Entomologist, University Extension Integrated Pest Management Program
How Do Earwigs Actually Get Inside — and Where Are the Real Entry Points?
This is where most earwig articles give vague advice like “seal cracks and gaps,” which isn’t wrong but isn’t useful either. Earwigs enter at ground level almost exclusively. They don’t fly in through open windows, they don’t rappel down from soffits, and they’re not coming through your attic. They follow moisture gradients — meaning they move toward wherever cool, humid air is escaping from your home — and they’re flat enough to slip through a gap of just 1/8 inch.
The specific entry points that matter for earwigs are different from what you’d prioritize for mice or German cockroaches. Focus your inspection on these locations:
- Door sweeps and weatherstripping — especially on garage doors and any door that faces a mulched or planted bed. Even a 1/8-inch gap along the bottom is wide enough.
- Utility penetrations at or below grade — where HVAC lines, irrigation pipes, or electrical conduit enter the foundation. These are almost never fully sealed and are often right at soil level.
- Weep holes in brick veneer — these are intentional structural gaps, but earwigs move through them easily. Weep hole covers (mesh inserts) solve this without blocking drainage.
- Foundation cracks at or near grade — especially on the shaded north or east sides of the house where moisture lingers longest.
- Crawl space vents — if the screen mesh is damaged or missing, you’re giving earwigs direct access to the underfloor cavity and from there to interior spaces.
One thing worth knowing: if you’re finding earwigs consistently in one specific room or along one wall, the entry point is almost always within 6 to 10 feet of that location. Don’t walk the entire perimeter looking for problems — start directly outside the room where you keep seeing them.
What Actually Kills Earwigs — and What’s a Waste of Time?
Treating earwigs effectively requires two separate applications targeting two different zones, and most people only do one. The table below shows where each treatment type actually works and where it doesn’t, because applying the wrong product in the wrong zone is one of the most common reasons earwig problems persist after treatment.
| Treatment Type | Best Zone | Effectiveness Notes |
|---|---|---|
| Granular insecticide (bifenthrin or carbaryl) | Outdoor perimeter, mulch beds, garden borders | Kills on contact and provides 4–8 weeks residual; scatter within 10 ft of foundation |
| Liquid perimeter spray (permethrin or lambda-cyhalothrin) | Foundation wall up to 3 ft, doorframes, entry points | Apply 3-foot band up and 3-foot band out; reapply every 30 days or after heavy rain |
| Diatomaceous earth (food-grade) | Indoors along baseboards, behind appliances, crawl spaces | Works mechanically — damages exoskeleton and causes dehydration; loses effectiveness when wet |
| Boric acid dust | Wall voids, crawl space, beneath sub-flooring | Low toxicity to mammals; earwigs must walk through it; slow-acting over 24–72 hours |
The outdoor granular application is the step most homeowners skip — partly because it feels like yard work rather than pest control, and partly because the products are usually sold in big bags in the lawn care aisle rather than the pest control aisle. Don’t skip it. If you only spray the foundation wall and ignore the 10-foot zone beyond it, you’re treating the edge of the population while leaving the core of it completely untouched.
Earwig traps — the classic rolled-damp-newspaper trick, or commercial cardboard traps — are genuinely useful as a monitoring tool and can reduce numbers meaningfully in a localized area. They’re not a standalone fix for a real infestation, but they’ll tell you quickly whether your treatment is working by showing you if capture rates are dropping week over week. Place them along the foundation at night and check them in the morning. Just like how carpenter bee traps work best when positioned at the right height and location rather than just anywhere near the structure, earwig traps only produce useful data when they’re placed right at the moisture-harborage interface — not randomly around the yard.
Pro-Tip: Apply your granular perimeter treatment in late afternoon or early evening, not in the morning. Earwigs are nocturnal and most active between 9 PM and 2 AM — granules applied before peak activity hours means earwigs will move through fresh, undegraded insecticide the same night you treat.
Step-by-Step: How to Get Rid of Earwigs in Garden and Entry Points for Good
The reason earwig problems come back every season is that most treatments are reactive — you kill the earwigs inside and then do nothing to change the conditions that produced them. A long-term fix requires going through this sequence specifically in order, because each step sets up the next one. Doing step 4 before step 2, for example, just traps a population close to your house that you haven’t treated yet.
- Remove harborage material from the foundation zone. Pull mulch back 6 inches from the wall, relocate firewood stacks at least 20 feet from the house, and clear ground cover plants that touch the siding. Do this before any chemical treatment — you’re reducing the population’s support structure first.
- Fix moisture problems within 10 feet of the foundation. Regrade soil that slopes toward the house, extend downspout diverters at least 4 feet out, and check that drip irrigation isn’t saturating soil against the foundation. Earwigs can survive in dry conditions temporarily but won’t build a breeding population without consistent moisture.
- Apply granular insecticide in a 10-foot band around the perimeter. Use a product containing bifenthrin or carbaryl at the label rate. Scatter it through mulch beds, along garden borders, and in any groundcover within 10 feet of the house. Water it in lightly if conditions are dry — the active ingredient needs to reach soil level where earwigs rest during the day.
- Spray the foundation wall and entry points with liquid permethrin. Apply a 3-foot band along the base of the foundation and a 3-foot band out across the soil. Hit doorframes, window wells, utility penetrations, and any visible gaps. This creates the barrier that kills earwigs moving toward entry points after the granular treatment has displaced them from deeper in the yard.
- Seal confirmed entry points. Replace damaged door sweeps, caulk utility penetrations with silicone (not foam, which compresses and re-gaps), and install weep hole covers on brick veneer. Do this after treating, not before — sealing while a population is still active outside can push earwigs to find new gaps under pressure.
- Set monitoring traps and reapply the perimeter spray every 30 days during active season. In warm climates, earwig season runs nearly year-round. In northern states, you’ll see peak pressure from late spring through early fall. Reapply liquid perimeter treatment on a 30-day cycle and check traps weekly — if you’re still capturing significant numbers at week three, reapply early.
One honest nuance here: the severity of what you’re dealing with matters a lot. A few earwigs occasionally wandering into a basement in a dry climate is a different situation than hundreds appearing nightly in a crawl space under a humid coastal house. In the latter case, a single treatment round may not be enough, and you may genuinely benefit from a professional perimeter application using a higher-concentration bifenthrin formulation with a longer residual. There’s no shame in that — some perimeter earwig populations are large enough that DIY products, while effective, just need more cycles to knock them down. The same principle applies to beetles in the house, where the correct treatment approach depends entirely on which species you’re dealing with and where the population is actually living.
Also worth knowing: earwigs in your garden aren’t always a problem worth eliminating entirely. They prey on aphids, mites, and other soft-bodied insects at a meaningful rate. The goal isn’t a zero-earwig garden — it’s a managed population that stays outside and stays manageable. Once you’ve resolved the indoor intrusion issue, a moderate earwig presence in a garden bed 10 feet from your foundation is doing more good than harm.
Start outside, work inward, and stay consistent with the perimeter spray through the active season. That sequence — not any single product or trick — is what actually ends an earwig problem rather than just delaying it until next month.
Frequently Asked Questions
what kills earwigs instantly?
A direct spray of rubbing alcohol mixed with water (70% concentration) kills earwigs on contact. You can also use insecticidal soap or a store-bought pyrethrin-based spray — both work fast and are safe to use around most garden plants.
how do I get rid of earwigs in my garden without pesticides?
Set out damp rolled newspaper or cardboard tubes near your garden beds at night — earwigs crawl in by morning and you can drop the traps into soapy water to kill them. Diatomaceous earth sprinkled around plant bases also works well, as long as it stays dry, so reapply after rain.
why do I suddenly have so many earwigs in my house?
Earwigs move indoors when outdoor conditions get too hot, dry, or after heavy rain floods their hiding spots. They’re attracted to moisture, so you’ll most often find them near leaky pipes, basement walls, or damp crawl spaces — fixing those moisture problems is the fastest way to make your home less attractive to them.
how do earwigs get into the house?
Earwigs squeeze through gaps as small as 1/16 of an inch, so common entry points include door sweeps, foundation cracks, utility pipe openings, and torn window screens. Sealing these gaps with weatherstripping or caulk and adding a tight-fitting door sweep can cut off most of their access points.
does dish soap kill earwigs?
Yes — a simple mix of dish soap and water (about 1 tablespoon of soap per quart of water) kills earwigs by breaking down their outer coating, causing them to dehydrate. It works best as a direct-contact spray and is a good non-toxic option for spot treatments around doorways or in the garden.
Disclaimer: This article is for informational purposes only and isn’t a substitute for professional pest control advice. Always read and follow the product label instructions exactly — label directions are legally binding and vary by brand and active ingredient. Keep all pesticides, baits and traps away from children and pets, ventilate treated areas as directed, and consider calling a licensed pest control professional if an infestation is large, recurring, or involves a structural pest like termites or carpenter ants.