
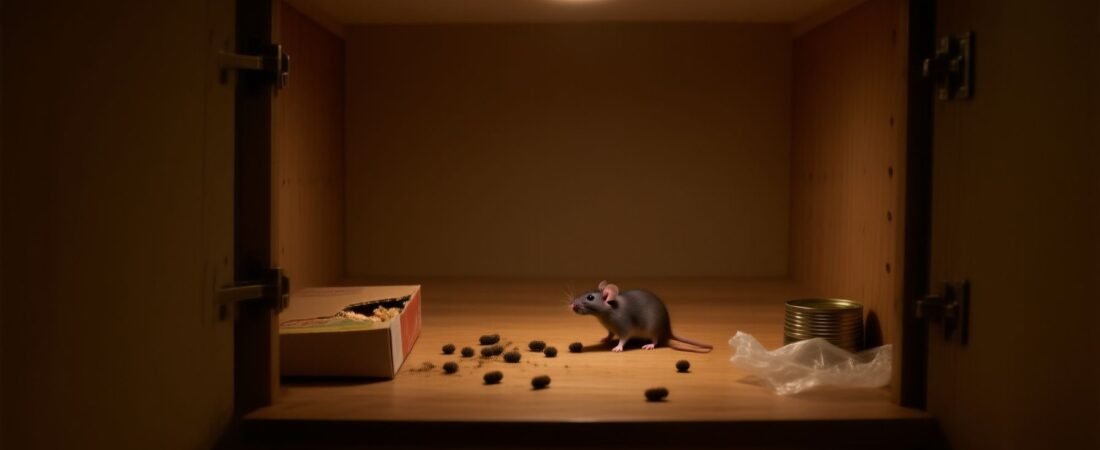
You already set traps near the walls and sealed the gap behind the stove — and mice are still getting into your kitchen drawers. Here’s the uncomfortable truth most mouse-control advice skips: the drawer and cabinet space in your kitchen is often the last place people treat and the first place mice actually live. They’re not passing through your kitchen to get somewhere else. The drawers and lower cabinets are the destination, and every piece of generic “seal entry points” guidance misses what’s actually happening inside that space.
Why Mice Target Kitchen Drawers and Cabinets Specifically (Not Just Your Kitchen)
Mice don’t wander into drawers by accident. Lower kitchen cabinets sit directly on top of a void space — the toe-kick cavity — that runs the entire length of your cabinetry and connects to wall voids, under-sink plumbing gaps, and sometimes the subfloor. Once a mouse enters that cavity, it has immediate access to every drawer and cabinet in your kitchen without ever crossing open floor. That’s why you can find droppings in a drawer on the opposite side of the kitchen from where you think the mouse entered.
Drawers are particularly appealing because they’re dark, rarely disturbed, and almost always contain food residue — crumbs from utensil drawers, cooking oil residue on tools, forgotten packets of sugar. A mouse needs only about 3–5 grams of food per day to thrive, and the average kitchen drawer provides that without effort. The warmth from adjacent appliances and the insulating effect of cabinet walls makes the space feel like purpose-built rodent housing.
This image shows the typical gnaw damage and dropping pattern found along drawer runners and cabinet corners — notice how the activity concentrates along edges and back corners, not the center, which tells you the mouse is using the perimeter as a travel corridor rather than simply raiding the drawer randomly.
How Are Mice Getting Into the Drawers If You Can’t See a Hole?
The entry point almost no one checks is the toe-kick panel — that flat board running along the base of your lower cabinets between the floor and the bottom shelf. Most toe-kick panels are press-fit or lightly stapled, not sealed. Behind them is a 3–4 inch tall horizontal cavity that connects directly to wall gaps, drain pipe penetrations, and even the space under the dishwasher. A mouse can squeeze through a gap as small as 1/4 inch, and the toe-kick cavity typically offers openings far larger than that where pipes exit the wall.
Pull a toe-kick panel off carefully and shine a flashlight inside. You’ll almost certainly see the pipe penetrations for your dishwasher supply line or the drain plumbing — and those holes are rarely sealed with anything at all. That’s the highway. From there, mice move up through the gaps around drawer slide hardware, through the space where cabinet boxes meet each other, and through any knocked-out or unfinished panel backs. This is why traps placed only on the kitchen floor often catch nothing: the mouse never needs to touch the floor if the cabinet interior is already satisfying all its needs.
Pro-Tip: Before placing any traps or bait, pull each lower cabinet’s toe-kick panel and photograph what you find behind it. Look specifically for pipe penetrations, gaps where the cabinet box meets the wall, and any existing gnaw marks or smear trails along the baseboard inside the cavity. This single step will show you more about your actual infestation than any amount of perimeter inspection from the outside.
What Does an Active Infestation in Cabinets Actually Look Like?
Identifying active versus old activity matters before you spend money on treatments. Mouse droppings in kitchen cabinets are the most obvious sign, but their location tells you more than their presence. Fresh droppings are dark, moist, and soft — they’ll smear if pressed. Droppings older than 48–72 hours are dry, gray, and crumble when touched. If you’re finding both, the infestation is ongoing. If only dry ones, you might be dealing with a past problem that’s already resolved — though that’s the minority of cases.
Beyond droppings, look for gnaw marks on the corners of drawer boxes (mice chew to widen gaps, not just out of instinct), grease smears along the inside back wall of lower cabinets (oil from their fur leaves a gray-brown residue on surfaces they travel repeatedly), and shredded paper or fabric tucked into the back corners of cabinets — nesting material. A single female house mouse can produce 5–10 litters per year with 3–12 pups each, so what looks like a minor problem with a few droppings can become a serious infestation within 3–4 weeks if a nesting female is present.
“The toe-kick void is probably the most consistently overlooked harborage area in residential kitchens. I’ve seen exterminators place bait stations along baseboards for weeks without results because no one looked behind that panel. Once you address the void and seal the pipe penetrations, the biology of the infestation shifts almost immediately — you cut off their safe travel corridor, and they’re suddenly exposed.”
Dr. Marcus Hale, Board-Certified Entomologist and Structural Pest Management Consultant, NPMA Member
How to Get Rid of Mice in Kitchen Drawers and Cabinets: Step-by-Step
The sequence here matters as much as the individual steps. A lot of people jump straight to traps and then wonder why they’re catching nothing. Traps work best after you’ve mapped the activity, removed food sources inside the cabinets, and placed traps along confirmed travel corridors — not randomly. Think of it as funneling, not hoping.
- Empty and inspect all cabinets and drawers. Remove everything, clean with a disinfectant solution (mice carry hantavirus and Salmonella), and identify exactly which drawers and cabinet sections show active signs. This is your map.
- Remove the toe-kick panels and inspect the cavity. Look for entry points, pipe gaps, gnaw marks, and nesting material. Photograph everything so you can reference it later.
- Seal all pipe penetrations and gaps inside the toe-kick cavity first. Use steel wool stuffed tightly into gaps, followed by expanding foam sealant over the steel wool. Steel wool alone compresses over time; the foam locks it in place and mice won’t chew through the combination.
- Place snap traps inside the toe-kick cavity and at the back of lower cabinets. These are the confirmed travel corridors. Bait with peanut butter, hazelnut spread, or a small piece of nesting material (a cotton ball works well). Check every 24 hours — a trap with a dead mouse that sits for days becomes a deterrent to other mice. If you want guidance on which traps perform best, the Best Rat Snap Traps: Victor vs Tomcat vs Authenzo Compared review covers the mechanics of what makes a snap trap actually trigger reliably, which applies directly to mouse traps in confined spaces.
- Replace toe-kick panels with an airtight seal. Once traps have been clear for 5–7 consecutive days, re-install the toe-kick panel with construction adhesive or screws and seal the perimeter edge with caulk. This converts an open highway into a sealed dead end.
- Reassess at 10 days. If activity continues after sealing the toe-kick cavity, the entry point is elsewhere — check under the sink for pipe gaps, behind the refrigerator, and along the dishwasher sides.
One honest nuance here: the effectiveness of this sequence depends on building type. In older homes with original plaster walls and original cabinet installations, there are often additional void spaces behind the cabinet boxes themselves where they don’t sit flush against the wall. In those situations, sealing the toe-kick alone may not be enough — you may also need to add backer material or seal the gap between the cabinet top and the soffit above.
What to Use (and What Not to Bother With) Inside Kitchen Cabinets
The confined, food-adjacent nature of kitchen cabinets rules out several common rodent control products that work fine elsewhere. Poison bait blocks are the big one — placing rodenticide inside a kitchen cabinet creates a serious risk of secondary contamination if a mouse dies inside the cabinet, and many rodenticide products are explicitly labeled not for use in food-preparation areas. Beyond the label issue, a mouse that ingests bait often crawls into a wall void to die, which creates an odor problem that can last 2–6 weeks depending on cabinet construction and ventilation.
Snap traps, electronic kill traps, and live catch traps are all food-safe options when placed correctly. Glue traps inside cabinets are ineffective in this specific context — the thin layer of dust and grease on cabinet surfaces reduces adhesion, and a partially caught mouse can drag a glue board further into the cabinet, making retrieval difficult. Repellent products like peppermint oil sachets are popular but perform poorly in enclosed spaces where mice are already established and motivated by food and shelter. The research backing peppermint as a deterrent is genuinely weak once mice are comfortable in a space.
| Product Type | Safe for Kitchen Cabinets? | Effectiveness for Established Infestation | Notes |
|---|---|---|---|
| Snap Traps | Yes | High | Place at back corners of cabinets and in toe-kick cavity |
| Electronic Kill Traps | Yes | High | Require batteries; good for tight spaces; no mess |
| Rodenticide Bait Blocks | No | N/A | Not labeled for food-prep areas; secondary contamination risk |
| Glue Boards | Not Recommended | Low in cabinets | Lose adhesion on dusty/greasy surfaces; retrieval difficult |
| Peppermint / Repellent Sachets | Yes | Very Low | Not effective for established infestations |
It’s also worth flagging that some pest problems inside kitchen cabinets get misidentified as mice when the culprit is something else entirely. If you’re finding tiny droppings with no gnaw damage and no grease smears, you might be dealing with a stored product pest like grain beetles or cockroaches rather than mice. Getting the identification right before committing to a rodent control strategy saves real time and money — the same way that bird mite problems in attics get misread as general “bug problems” until someone properly identifies what’s actually there (the Best Bird Mite Sprays and Dusts for Attics guide is a good example of how much the right ID changes the treatment approach).
How to Prevent Mice From Coming Back After You’ve Cleared Them Out
Clearing an active infestation and preventing reinfestation are genuinely different problems, and most people only solve the first one. The single biggest re-entry risk after you’ve sealed the toe-kick and cleared the traps is the under-sink cabinet — it’s the one cabinet in virtually every kitchen that has multiple large pipe penetrations, is often slightly damp (which mice prefer), and is opened infrequently enough that reinfestation can go unnoticed for weeks. After clearing an infestation, install a simple snap trap at the back of the under-sink cabinet permanently and check it monthly. It takes about 10 seconds and catches re-entry early.
Food storage inside cabinets deserves more attention than the standard “use sealed containers” advice suggests. The counterintuitive detail is that the biggest attractants in a kitchen drawer aren’t usually the obvious ones — they’re the residue on cooking tools, the dried food debris in drawer organizer slots, and the crumbs that accumulate in the narrow channel where drawers slide in and out. Mice will return to a cabinet that smells like food even if there’s nothing obviously edible left. Cleaning drawer slides and organizer trays with a white vinegar solution removes the food odor signals and is underrated as a prevention step.
- Store all dry goods (flour, oats, rice, cereals) in hard-sided containers with locking lids — not just sealed bags, which mice chew through in seconds
- Clean drawer slide channels and organizer trays monthly with a vinegar-water solution to eliminate residual food odor
- Check under-sink pipe penetrations every 6 months — sealant around pipes shrinks and cracks over time and gaps reopen without any obvious visual change from the front
- Keep a single snap trap positioned permanently at the back of the under-sink cabinet as an early-warning system — if you catch something, you know re-entry has happened before it escalates
- After any plumbing work, dishwasher replacement, or cabinet repair, re-inspect the toe-kick cavity — tradespeople rarely re-seal pipe gaps after working in that space
The broader point that most pest control advice glosses over is this: kitchen cabinets and drawers aren’t just a place where mice show up — they’re a place mice choose because the conditions are exactly right. Addressing those conditions directly (the hidden voids, the pipe gaps, the food residue signals) is what creates a kitchen that’s genuinely uninviting to mice long-term, not just one that’s been recently treated. Once you understand what makes that space attractive, prevention stops feeling like a chore and starts feeling like something with obvious logic behind it.
Frequently Asked Questions
how do I know if mice are living in my kitchen cabinets?
The most obvious signs are small dark droppings (about the size of a grain of rice), gnaw marks on food packaging, and a musky ammonia-like smell. You might also find shredded paper, fabric, or insulation tucked into the back corners of drawers — that’s nesting material. If you’re seeing more than a few droppings in one spot, you likely have an active infestation, not just a single mouse passing through.
what is the fastest way to get rid of mice in kitchen drawers?
Snap traps are still the fastest and most effective option — place them at the back of the drawer or cabinet, perpendicular to the wall, with the trigger end facing the surface mice run along. Peanut butter is one of the best baits you can use, and you only need a pea-sized amount. Check and reset traps every 24 hours, since dead mice left too long can attract other pests.
is it safe to use mouse poison in kitchen cabinets where food is stored?
It’s generally not recommended to place rodenticide bait stations directly inside cabinets or drawers where you store food, dishes, or cookware — the risk of contamination is too high. If you want to use poison, place tamper-resistant bait stations along baseboards or behind appliances instead, well away from food contact surfaces. Snap traps are a safer choice for the inside of cabinets.
how do mice get into kitchen cabinets in the first place?
Mice can squeeze through gaps as small as 1/4 inch — about the width of a pencil — so they often enter through the gaps around plumbing pipes under the sink, where cabinet walls meet the floor, or through damaged drawer slides and panel seams. Check the inside of your under-sink cabinet first, since that’s where most mice enter from the wall void. Steel wool packed into those gaps, followed by caulk or expanding foam, is a solid first line of defense.
how do I clean and disinfect kitchen cabinets after mice?
Don’t sweep or vacuum mouse droppings dry — that can kick up particles that are harmful to breathe. Instead, put on gloves and spray the droppings with a disinfectant or a bleach solution (1 part bleach to 10 parts water), let it soak for 5 minutes, then wipe everything up with paper towels and bag it immediately. Wash the inside of the cabinets and drawers with the same solution, let them air out completely, and throw out any food that wasn’t in a hard, sealed container.
Disclaimer: This article is for informational purposes only and isn’t a substitute for professional pest control advice. Always read and follow the product label instructions exactly — label directions are legally binding and vary by brand and active ingredient. Keep all pesticides, baits and traps away from children and pets, ventilate treated areas as directed, and consider calling a licensed pest control professional if an infestation is large, recurring, or involves a structural pest like termites or carpenter ants.